Introduction:
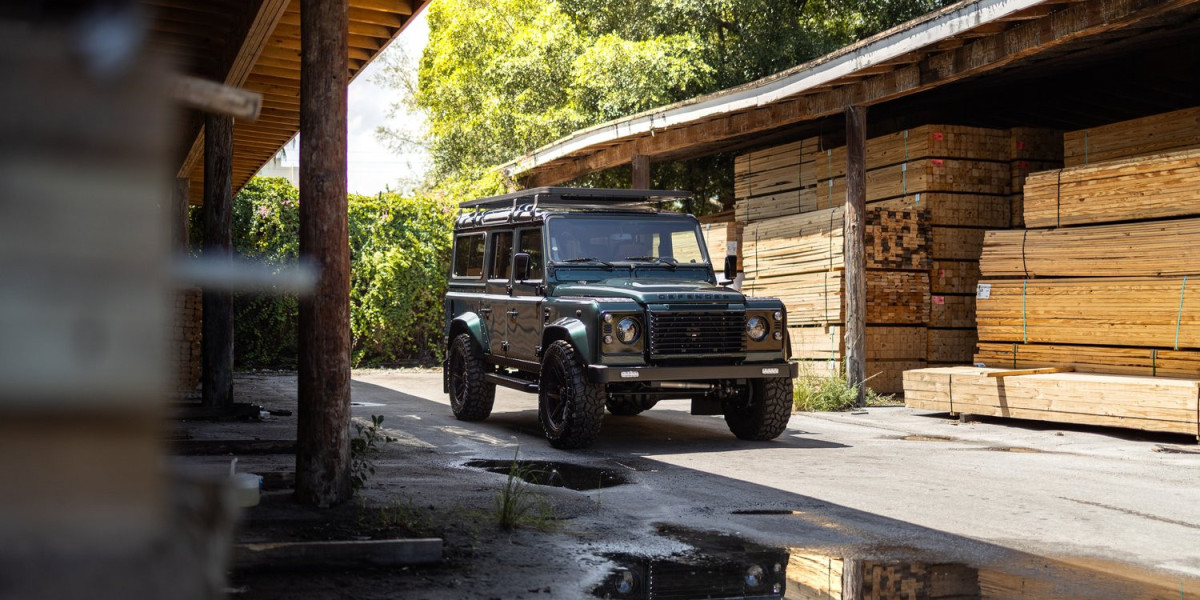
Vintage Land Rover Defenders hold a timeless charm, capturing the essence of adventure and rugged exploration. Whether you've inherited a weathered relic or stumbled upon a forgotten gem, embarking on a journey to rebuild a vintage Defender can be a gratifying experience. This process combines craftsmanship, mechanical prowess, and a touch of nostalgia to breathe new life into a vehicle that has stood the test of time.
Step 1: Assessment and Planning
Before diving into the restoration process, a comprehensive assessment of the Defender's condition is crucial. Take note of the rust, structural damage, and the state of its engine and transmission. Once you have a clear understanding of the challenges ahead, create a detailed plan outlining the scope of the rebuild. This plan should cover everything from the exterior aesthetics to the performance upgrades you envision.
Step 2: Dismantling and Stripping
To unveil the Defender's true potential, a systematic dismantling is necessary. Carefully disassemble each component, documenting and labeling parts for easy reassembly. This step provides an opportunity to identify hidden issues and ensures that every element is inspected, repaired, or replaced as needed.
Step 3: Rust Eradication
Vintage Defenders often suffer from rust, a common ailment that requires meticulous attention. Use a combination of abrasive techniques, rust converters, and protective coatings to eliminate rust and prevent its return. This step is critical for preserving the vehicle's structural integrity and extending its lifespan.
Step 4: Mechanical Overhaul
Addressing the mechanical aspects is a pivotal part of the rebuild process. Rebuild or replace the engine, transmission, and suspension components to ensure optimal performance. Upgrading to modern systems, such as electronic fuel injection, can enhance the Defender's reliability and drivability without compromising its classic charm.
Step 5: Aesthetic Revival
The exterior and interior design elements contribute significantly to the Defender's vintage appeal. Invest time in choosing authentic colors and materials that resonate with the era the vehicle hails from. Reupholster seats, restore gauges and instruments, and refurbish the dashboard to recapture the vehicle's original allure.
Step 6: Performance Upgrades
While preserving the vintage aesthetics is crucial, integrating subtle performance upgrades can enhance the Defender's capabilities. Consider advancements in braking systems, suspension, and tires to improve handling and safety without compromising the classic driving experience.
Step 7: Reassembly and Testing
With the individual components restored and upgraded, meticulously reassemble the Defender. Take this opportunity to test each system thoroughly, ensuring that the rebuilt vehicle meets modern safety standards and performance expectations.
Conclusion:
Embarking on a Vintage Defenders rebuild is a labor of love, requiring dedication, skill, and a passion for preserving automotive history. The end result is more than just a revitalized vehicle; it's a testament to the enduring legacy of the Land Rover Defender. Each rebuilt Defender tells a unique story of craftsmanship, commitment, and the unwavering spirit of adventure that these iconic vehicles embody.